


Programming the Sno-Way® ProControl™
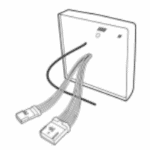
- Ensure vehicle bumper connection is made and the vehicle supply voltage is 12VDC. Also, verify that the 14-pin and 4-pin (when present) connectors are connected from the receiver module to the power unit.
- Start by putting the Sno-Way® ProControl™ transmitter into pairing mode by pressing the ON and Timer buttons (two buttons below the LCD screen) simultaneously until “Pairing Remote” is displayed on the transmitter LCD screen.
- Place a metal object across the 2 pin Transmitter Code Learn contacts on the receiver module.
- The ProControl™ transmitter LCD should now say “Paired Plow”. Press the Power key once to complete the pairing process. The ProControl™ will beep twice and the LCD display will flash “Pairing Complete”. NOTE: Unlike the previous generation wireless controls, the ProControl™ receiver module does not need to be cleared before pairing a new transmitter. If at any time the receiver module on wireless units is disconnected or power is interrupted, the ProControl™ transmitter will display “lost connection” on its LCD screen.
Diagnostic Functions / Lost Signal No Receiver
Your Sno-Way® ProControl™ transmitter has a built-in diagnostic capability. There is a chart on page 11 of the installation and owner’s manual for the ProControl™ (97101382). This includes the audible alerts, screen displays, and descriptions used to make you aware of a problem.
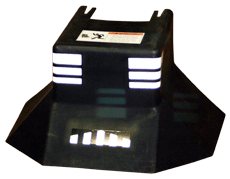
What does the blinking red L.E.D. on the Sno-Way® ProControl™, ProControl™ II, and ProControl™ 2 Plus Receiver mean?
The Red or amber L.E.D light blinking indicates that you have at least 5.5Vof power supplied to the receiver. When the light is solid green the control is turned on and paired to the receiver.
How do I use the Auxiliary Functions?
This “AUX” button is used to control an external relay (installed by the end-user). This relay could control a multitude of items, ranging from beacon lights to additional plow lamps. This output is fused at 3 amps.
Remaining Buttons
The remaining buttons not discussed are for future innovations and currently provide no functionality.
How to replace the Sno-Way® ProControl™ battery
Although the Sno-Way® ProControl™ battery is rechargeable it will require replacement after a finite number of charge cycles. To access the battery pack, remove 2 screws securing the battery cover. Remove battery cover to expose battery pack. Once the battery pack is exposed, move to one side to expose the 4 pin connector that connects the battery wires to the circuit board. Unplug connector and discard old battery. For installation, follow steps in reverse. 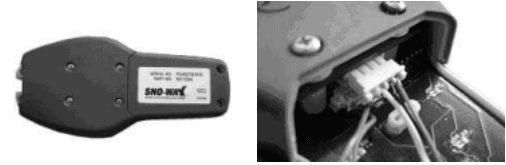
What is the warranty on the Sno-Way® ProControl™ battery?
There is a one-year limited warranty on all ProControl™ rechargeable batteries.
Can I convert my Legacy control to a ProControl™?
Any plow with a Monarch/Bucher SMO1 pump can be upgraded to the new ProControl™ 2 Plus because they are all based on the same ground switching system. This includes ST, MT, HT, HTV/28V, 22, 26, 29, 29T, 29HD 32.